We will guide you through the process of setting up our suggested splitters.

To set up ManyCam, a popular webcam software, follow these steps:
- Download and Install: Visit the ManyCam website (https://manycam.com/) and download the appropriate version of the software for your operating system. Once the download is complete, run the installer and follow the on-screen instructions to install ManyCam on your computer.
- Launch ManyCam: After installation, launch ManyCam from your desktop or Start menu.
- Select Video Source: In the ManyCam interface, you’ll see a list of available video sources on the right side. Choose your desired video source, such as your webcam, by clicking on it. ManyCam supports various video sources, including webcams, IP cameras, and video files.
- Customize Effects and Overlays: ManyCam offers a range of effects and overlays to enhance your webcam feed. Click on the Effects tab to explore different effects categories, such as backgrounds, face masks, filters, and text overlays. Select the desired effect and it will be applied to your video source.
- Add Additional Video Sources: ManyCam allows you to add multiple video sources to your stream. Click on the + icon next to the video sources list and select the additional source you want to add, such as a secondary webcam or a pre-recorded video file. You can switch between these sources during your live stream.
- Configure Audio Settings: ManyCam also enables you to configure audio settings. Click on the Audio tab to select your preferred audio source, whether it’s your computer’s microphone or an external microphone connected to your system. Adjust the volume levels as needed.
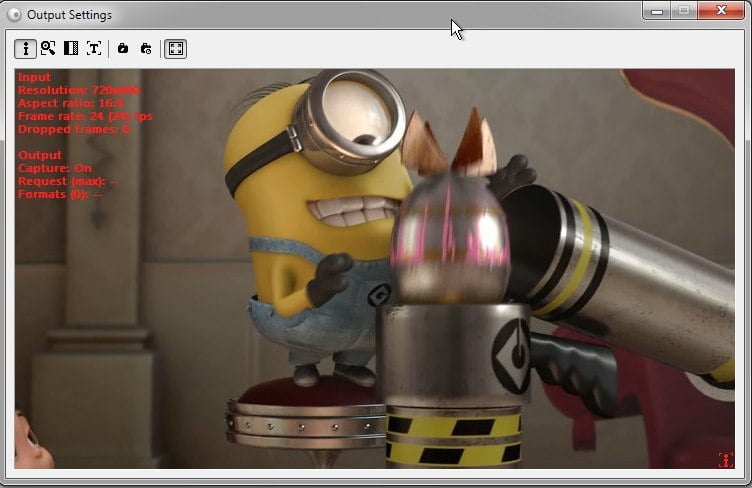
- Adjust Video Settings: To fine-tune your video settings, click on the Video tab. Here, you can adjust properties like resolution, frame rate, and aspect ratio. ManyCam offers additional features like zoom, pan, and rotation to customize your video output.
- Stream with ManyCam: Once you’ve configured your desired video and audio sources, effects, and settings, you’re ready to start streaming.
Note: ManyCam offers both free and paid versions, with the paid version providing access to additional features and removing watermarks. Explore the ManyCam website to learn more about the specific features and pricing options available.
Remember to test your setup before going live to ensure everything is working correctly. Have fun exploring the various features and options that ManyCam offers to enhance your webcam streaming experience.
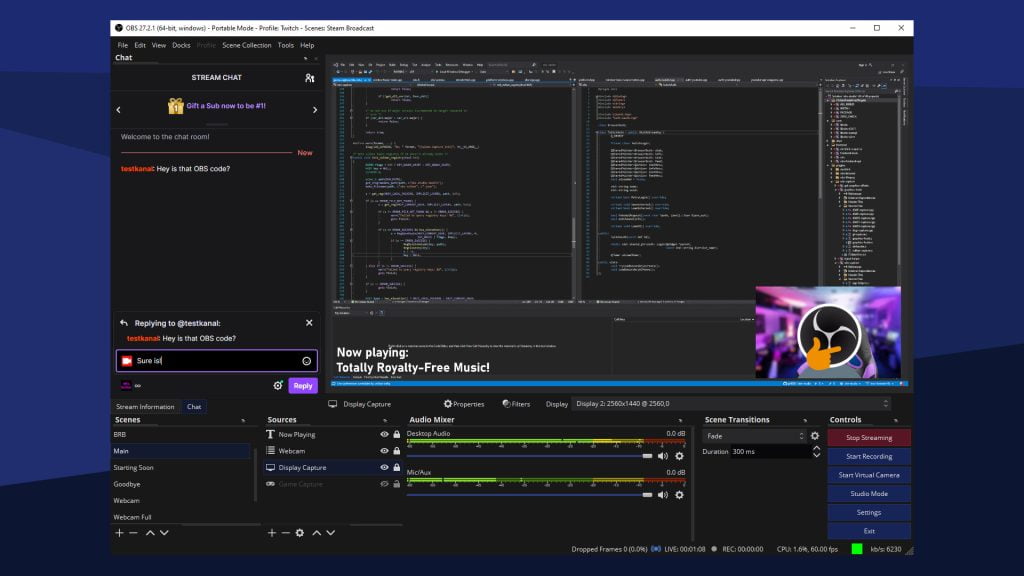
To set up OBS Virtual Cam, a plugin that allows you to use OBS output as a virtual camera input, follow these steps:
- Download and Install OBS Studio: If you haven’t already, download and install OBS Studio, the popular open-source broadcasting software. You can find it at the official OBS Studio website (https://obsproject.com/). Follow the on-screen instructions to install it on your computer.
- Download OBS Virtual Cam Plugin: Visit the OBS Project GitHub page dedicated to OBS Virtual Cam (https://github.com/CatxFish/obs-virtual-cam) and download the appropriate version of the plugin for your operating system. Ensure that you choose the version compatible with your OBS Studio installation.
- Install OBS Virtual Cam Plugin: Once the plugin is downloaded, locate the downloaded file and run the installer. Follow the on-screen instructions to install the OBS Virtual Cam plugin. It will automatically integrate with OBS Studio.
- Launch OBS Studio: After installing the plugin, launch OBS Studio from your desktop or Start menu.
- Enable Virtual Camera Output: In OBS Studio, go to the “Tools” menu and select “VirtualCam.” This will open the VirtualCam settings window.
- Configure VirtualCam Settings: In the VirtualCam settings window, you can adjust the output resolution and frame rate of the virtual camera feed. Choose the desired settings based on your requirements.
- Start Virtual Camera Output: Once you’ve configured the settings, click on the “Start” button in the VirtualCam settings window to enable the virtual camera output. OBS Studio will now begin sending its output to the virtual camera.
- Use OBS Virtual Cam in Applications: Open the application where you want to use OBS Virtual Cam as your camera input. Navigate to the application’s settings or preferences related to video input or webcam selection. Look for an option to select a camera input source and choose “OBS Virtual Camera” or a similar option from the list of available cameras.
Note: OBS Virtual Cam may not be available on all platforms or versions of OBS Studio. Make sure to check the compatibility and requirements of OBS Virtual Cam before proceeding with the setup.
Remember to test OBS Virtual Cam by opening the desired application and confirming that the OBS Studio output is correctly being received as the camera input. Adjust any settings as needed for optimal performance in each application.
To set up SplitCam, a webcam software that allows you to add effects and use your webcam in multiple applications simultaneously, follow these steps:
- Download and Install: Visit the SplitCam website (https://splitcam.com/) and download the appropriate version of the software for your operating system. Once the download is complete, run the installer and follow the on-screen instructions to install SplitCam on your computer.
- Launch SplitCam: After installation, launch SplitCam from your desktop or Start menu.
- Select Video Source: In the SplitCam interface, you’ll see a list of available video sources on the left side. Choose your desired video source, such as your webcam, by clicking on it. SplitCam supports various video sources, including webcams, IP cameras, and video files.
- Customize Effects and Overlays: SplitCam offers a range of effects and overlays to enhance your webcam feed. Click on the Effects tab to explore different effects categories, such as filters, masks, backgrounds, and frames. Select the desired effect, and it will be applied to your video source.
- Configure Audio Settings: SplitCam allows you to configure audio settings as well. Click on the Audio tab to select your preferred audio source, such as your computer’s microphone or an external microphone connected to your system. Adjust the volume levels as needed.
- Add Additional Video Sources: SplitCam enables you to add multiple video sources to your stream. Click on the + icon next to the video sources list and select the additional source you want to add, such as a secondary webcam or a pre-recorded video file. You can switch between these sources during your live stream.
- Set Up SplitCam as Virtual Webcam: To use SplitCam in other applications, you need to set it up as a virtual webcam. Go to the Tools menu and select Virtual Webcam. Enable the virtual webcam feature, and SplitCam will appear as an available webcam option in other applications.
- Use SplitCam in Applications: Open the application where you want to use SplitCam as your webcam source. Navigate to the settings or preferences of the application and select SplitCam as your video input device. This will allow the application to receive the video feed from SplitCam with the applied effects and overlays.
Note: SplitCam is available for free, but there is also a Pro version with additional features. Explore the SplitCam website to learn more about the specific features and differences between the free and Pro versions.
Remember to test your setup in different applications to ensure that SplitCam is working correctly and that your desired effects and overlays are being applied. Enjoy using SplitCam to enhance your webcam experience across various applications.
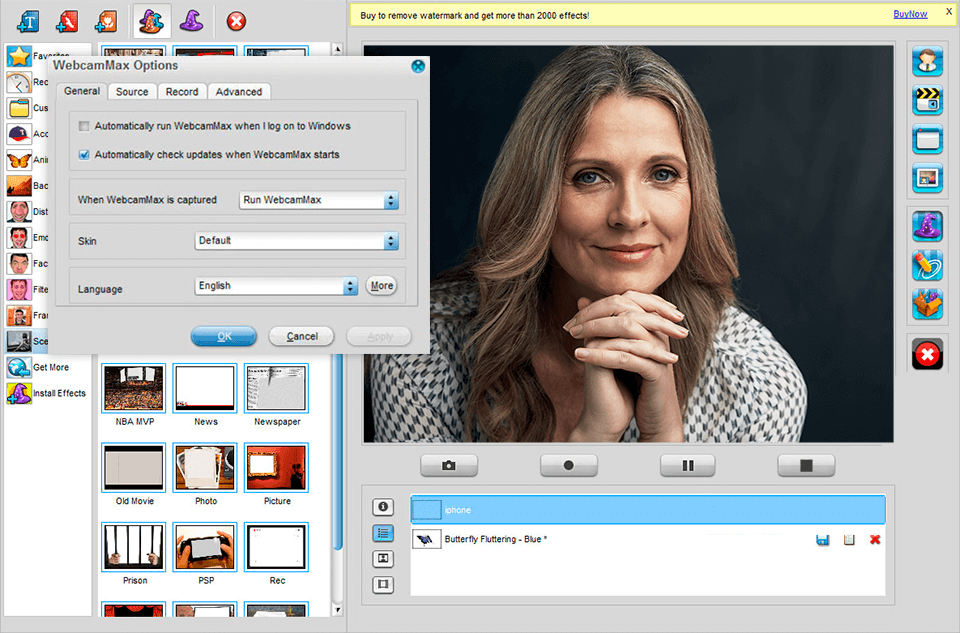
To set up WebcamMax, a software that offers a range of effects and enhancements for your webcam, follow these steps:
- Download and Install: Visit the WebcamMax website (https://www.webcammax.com/) and download the appropriate version of the software for your operating system. Once the download is complete, run the installer and follow the on-screen instructions to install WebcamMax on your computer.
- Launch WebcamMax: After installation, launch WebcamMax from your desktop or Start menu.
- Select Video Source: In the WebcamMax interface, you’ll see a list of available video sources on the left side. Choose your desired video source, such as your webcam, by clicking on it. WebcamMax supports various video sources, including webcams, IP cameras, and video files.
- Customize Effects and Overlays: WebcamMax offers a wide range of effects and overlays to enhance your webcam feed. Explore the available effects categories, such as filters, backgrounds, animations, and face masks. Select the desired effect, and it will be applied to your video source.
- Adjust Settings: WebcamMax provides settings to fine-tune your video and audio. Click on the Settings icon within the interface to access the settings menu. Here, you can adjust properties like resolution, frame rate, audio input, and output settings according to your preferences.
- Test and Preview: WebcamMax includes a preview window that allows you to see the effects and enhancements in real-time. Use this feature to test different effects, overlays, and settings to ensure they appear as desired.
- Use with Applications: WebcamMax integrates with various video chat and streaming applications. Open the application where you want to use WebcamMax as your webcam source. Navigate to the settings or preferences of the application and select WebcamMax as your video input device. This will allow the application to receive the video feed from WebcamMax with the applied effects and overlays.
Note: WebcamMax offers both free and paid versions, with the paid version providing access to additional features and effects. Explore the WebcamMax website to learn more about the specific features and pricing options available.
Remember to test your setup in different applications to ensure that WebcamMax is working correctly and that your desired effects and overlays are being applied. Enjoy using WebcamMax to enhance your webcam experience during video chats and streaming sessions.
To set up WebCamSplitter, a software that allows you to split your webcam video feed for multiple applications, follow these steps:
- Download and Install: Visit a trusted website that offers WebCamSplitter software, such as https://very-soft.com/product/webcamsplitter . Download the appropriate version of the software for your operating system. Once the download is complete, run the installer and follow the on-screen instructions to install WebCamSplitter on your computer.
- Launch WebCamSplitter: After installation, launch WebCamSplitter from your desktop or Start menu.
- Select Webcam Source: In the WebCamSplitter interface, you’ll see a list of available webcam sources. Choose the webcam you want to split by selecting it from the list.
- Configure Splitting Settings: Within the WebCamSplitter interface, you can configure the settings for splitting your webcam feed. Choose the splitting method you prefer, such as splitting the feed into equal parts for multiple applications or assigning priority to a specific application. You may also adjust other settings like video format, resolution, and frame rate.
- Add applications: In the WebCamSplitter interface, you’ll find an option to add applications that will receive the split webcam feed. Click on the “Add” or “Add Application” button and browse for the executable file (e.g., .exe) of the application you want to use with the split webcam feed. Repeat this step for each additional application you want to add.
- Configure Application Settings: Once you’ve added the applications, you can further configure their settings. For each application, you can choose the desired video format, resolution, and frame rate specific to that application’s requirements. This ensures optimal compatibility and performance.
- Start Splitting: After configuring the settings and adding the desired applications, you can start the webcam splitting process. Look for a “Start” or “Activate” button within the WebCamSplitter interface to initiate the splitting process.
- Use Split Webcam in Applications: Open the applications you added in WebCamSplitter and navigate to their video settings or preferences. Select “WebCamSplitter” or a similar option as the video input source within each application. This will allow each application to receive the split webcam feed and use it independently.
Note: WebCamSplitter may offer both free and paid versions, with additional features available in the paid version. Check the specific website you downloaded WebCamSplitter from for more details on pricing and available features.
Remember to test the setup by opening the applications and confirming that each application receives the split webcam feed correctly. Adjust any settings as needed for optimal performance in each application.
Suggested articles:
Follow us on Instagram and Twitter!
instagram: @soulcamsofficial
twitter: @SoulCam